Monday, March 26, 2012

Spicin' Things Up


Space in our kitchen is tight. Like...super tight. That counter space you see below? That's it. There's about 4 more inches to the right beyond this picture, and that be the end o' the counter. While we can't create more counter space, my bf and I decided to try and free up a bit of cupboard space. And we've learned pretty fast that walls are the key to freeing up space, even if it takes some creativity. Here is our prep area/stove before:


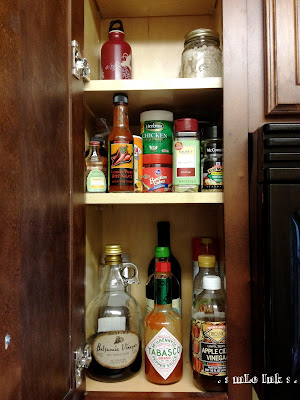
And here is our teeny tiny little skinny minnie cupboard to the left of the microwave. Few things fit in there, but spices are one of them. However, with so many jars and canisters in there, it was next to impossible to get what you needed without unloading the entire thing. Because let's face it--the thing you want is always in the back.


On our last trip to Ikea, I hunted all over for that little wooden spice rack I had seen in the past. It was just unfinished wood, and I remembered it being Cheapie-McCheaperson. But after some serious searching, we couldn't find the little guy. We grabbed a bunch of other items while on the pilgrimage, including some picture shelves for a little setup in the living area. But after some planning, I decided I only wanted to use 2 of the 3 since the upper spot was going to be occupied by another item (soon to come!). That left us with a little Ribba shelf all by his lonesome.

And then, the lightbulb flicked on. This little guy would make a perfect spice rack! While it didn't have any ends to keep items from scooting off sideways, it was a nice shallow depth with a lip in the front. And it just so happened it was about 1 inch narrower than our little baby stove/cooktop/oven. Here she blows:


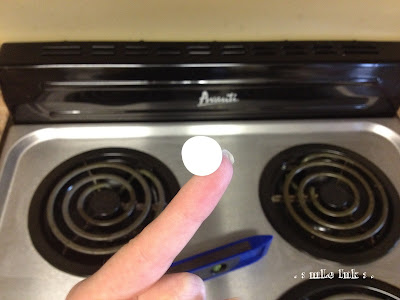
After some very basic planning, I gathered some tools to get 'er done. It took me a pathetically long time to figure out what the picture in the nonverbal Ikea directions were referring to with these little disks, but then I finally figured out it was two little white circle stickers to place over your screws to hide the color and blend everything with the back of the shelf (labeled below as the official "sticky screw cover thingies).


I simply centered the shelf over the stove above the little "splatter zone" we've created since moving in (wouldn't want to dirty up our nice white spice rack!), leveled it out (shelves are super easy to level since they're...well, shelves for your level to sit upon), and screwed my two screws in lickity split. I even did the whole thing all by my lonesome.


Then I grabbed my little sticky screw cover thingies...


...and placed them over the screw heads.


Easy peasy. Not perfect but they'll do the job considering this is very temporary and will be stocked with spice jars.


It freed up some space in the spice "closet..."


And looks pretty cute over our stove.  Not bad for a 5 minute project considering so many -hey-this-will-be-easy "simple projects" turn into nightmares that are anything but simple.


As my sister's boyfriend would say: "Approve!"

How about you guys? Installed any spice racks lately? Hacked something from Ikea to use as something else? Have a teeny tiny cabinet that can't even fit a dinner plate inside? Do tell!

Sunday, March 25, 2012

Roasted Asparagus & Balsamic Butter Pasta

The title says it all. This dish is super yummy and pretty easy...though I can't say it's particularly healthy. But that's Ok every once in a while right?

Behold:


I got the idea from this website that I found via Pinterest. I did make a few minor changes to the original recipe to try and cut back on the butter in my version and dirty fewer dishes/simplify the process; I haven't tried it with all of the butter recommended, but my version still tastes really really yummy, and I cut the butter by half! Feel free to make the original version (complete ingredients list and directions on the link above), but to try my lighter version, look below. I don't have step by step pictures, but I think you'll be Ok without them :)


Roasted Asparagus & Balsamic Butter Pasta

For this recipe you'll need:

  • 12-16 ounces of Asparagus (I buy it frozen and don't even bother to thaw it!)
  • Olive Oil for tossin'
  • Salt and Pepper for seasoning
  • 2 Tbsp of Parmesan Cheese
  • About a 1/2 cup of Balsamic Vinegar
  • 1 tsp of Brown Sugar
  • 12-16 ounces of Pasta of your choosing (I like Penne or any other smaller pasta with nooks and crannies)
  • 1/2 a stick of Butter (1/8 pound)
  • 1/4 cup Parmesan Cheese  


Directions:

  1. Preheat the oven to 400 degrees F. While it's preheating, prep your asparagus by snapping off the ends if needed and chopping into pieces about an inch in length. (Note: it's way easier to chop before you roast it...not that I've learned from experience or anything). Toss with olive oil, salt, and pepper and then spread out on a baking sheet or roasting pan. Sprinkle Parm cheese over the top. Roast in the oven for about 10 minutes, but start to check it around 8. When it's done, the cheese it toasty brown and the asparagus is tender and just starting to get some color. 
  2. While that's a roastin' boil some water and cook your pasta according to the instructions on the box/bag. Drain well.
  3. On the stove, heat the Balsamic Vinegar in a saucepan until it starts to bubble. Simmer until it reduces considerably, about 10 minutes. I like it when it becomes almost syrupy, so that when you tilt the pan, it leaves a coating behind. Do NOT smell it; it will burn your nostrils/eyes/face off. Before turning off the heat, add the brown sugar and dissolve; season with salt and pepper to taste. Remove from heat and swirl the butter in until it melts. Take your roasted asparagus and add it to the saucepan, coating the asparagus well.
  4. Toss the vinegar/asparagus mixture and the pasta in a large serving bowl. Add the Parm cheese to your liking. 
  5. Eat.


Even by using only half a stick of butter for my version, I still think it tastes great. I'm sure the whole stick makes it better. Considering it's for a pound of pasta, I guess it's not that bad...if it were some type of cream or cheese sauce, you'd be eating a LOT of cream or butter too, so I console myself with that.

This is also really good the next day cold; I bring leftovers in my lunch (if there are any) and eat it without reheating. Yum!

Let me know what you think! And if you have recipes to share, feel free to link in the comments :)